DIY: Yarn Wrapped Letters

Another great find on the Pinterest boards! I had to try this – particularly for the bridal shower. Because if a bridal shower isn’t reason enough to display your initials in LARGE FONT, then I dont’ know what else is.

This is only a partial tutorial and I’ll tell you why. You’re going to have to find you’re own groove. I thought this was going to be a very simple project – and for the most part, it was. Except for those pesky multi-dimensional letters. The flat S was cake. The other two? Meh.

Here’s what you’ll need:

Block Letters

Yarn

HOT GLUE <– yes, I cheated.

Scissors

Patience.

Start wrapping your letter at the easiest junction. Meaning don’t wrap the ‘serif’ portion yet. You want to cover MOST of the body of your letter.

Once most of the body is covered, you may need to cut your yarn. Tuck the excess string underneath the wrapped portion on the BACK side of the letter. Now, start your new thread on the serif ends of the letter. You’re going to have to play around with the directions here. I must of tried several different ways before I found what worked for me. And even then, I’m not sure if it was the best method.

Once you’ve covered both ends of your letter, tuck the string end into the wrapped portions on the back side of your letter. Then marvel at your awesome wrapped letter. And think, “How easy!” because you are going to need that to get you through those next two letters.

So, if you are working with a letter that has a hole in it (you know, A, B, D, O, etc.) you will need to have to use sections of yarn to get full coverage. With the A, I started wrapping the hole first – mainly because I wanted to get it out of the way!

Then I expanded out from there. As you can see, it was a “learn as you go” experiment. I finally had enough of my yarn slipping off the edges and I pulled out the glue gun – absolutely NO SHAME whatsoever.  That’s when I started making progress.

The E was a little easier than the A but still offered up challenges on then ends.

Once I found my groove, the rest was history. I was really pleased with the end results. Maybe I’ll even make a set for my house….one day.

The full tutorial on this post can be found on the Let Birdz Fly site. I love, at the end of the tutorial, how she framed out the letters on the wall. Great idea.

1 Comment

Filed under Uncategorized

DIY: Fall Yarn Wreath

Of course I drew this inspiration from my Pinterest board. It seems that all inspiration is come from there these days. But hey – at least it’s making me crafty, right? So win!

I hosted a bridal shower this weekend for one of my cousins. She’s getting married at the end of October and that means anything and everything Fall. I love Fall (and the weather) and I mean I L-O-V-E Fall! So, the decorating was an easy and welcome task for me to do. I wanted to make it a little special for her, with some special touches here and there. One of the things I wanted to make was a wreath for my front door. I had one that I’ve used for the past 4 years, but this year I wanted a more modern twist on things.  There’s a seller on Etsy, that makes some killer wreaths – ItzFitz – and while I love almost every single one of her wreaths, I didn’t have time to place an order, and I really wanted the challenge to see if I could do this myself.

So off to Hobby Lobby (one of my least favorite stores in this world) I went. The list for this DIY is relatively short, you’ll need the following:

Straw Wreath ($3.99)

Yarn ($3.99)

1/4 – 1/2 yard of felt – various colors if you like ($5.99/yard)

Fiber accents or Decorative yarn for embellishment.

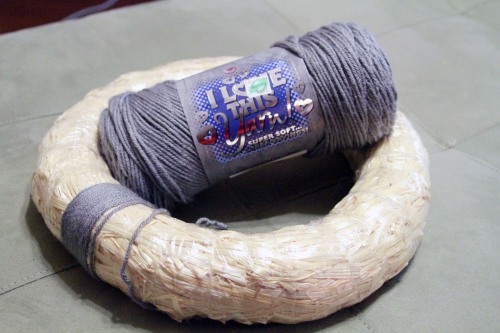
Step 1: Begin wrapping your wreath with the base color that you chose for the body of the wreath. I left the plastic on. It didn’t seem to cause any problems. Make sure to keep the yarn tight, but not too tight. The yarn will shift while wrapping, so you’ll need to make sure you keep pushing the yarn close to each other to prevent spacing.

Step 2: Keep wrapping. This is probably the most time consuming part of the entire project. If I would of sat down continuously, this part would of probably taken an hour to do. So pop in a movie or listen to some music to help pass the time.

Step 3: Wrap fiber accents (or decorative yarn) to add embellishment. I just so happen to have these guys in my stash. So I didn’t have to go out and buy anything. Some of the really crazy yarns would work well here too. I would use two separate kinds – having two separate textures also helped add some interest. So keep that in mind. Wrap the first color around the entire wreath, leaving a decent amount of space between each piece. Once you’ve secured that in place, take your next color and wrap it in the opposite direction essentially making an X at the intersection of each color. My spacing wasn’t perfect as I was in a hurry, but you may want to eyeball this before you secure it in place.

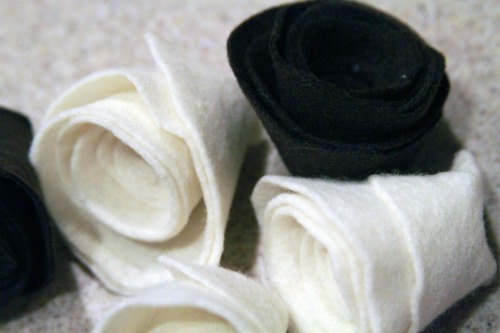
Step 4: Make the felt flowers. You can make as many as you want, but I wanted to keep it simple. I made five. Okay, I made more, but they were too huge and I had to restart them from scratch. But these are pretty easy to make. Don’t be intimidated! My pics are of the red color, which I later decided against. You’ll see in the final product. I highly suggest watching this video tutorial that shows you the proper way to make these flowers. I followed it to a T. I originally wanted to make my flowers two-tone, but again, due to time, I stuck with the solid color. Next time.

Step 5: Glue on the flowers. I highly suggest playing around with your placement before committing to glue. I had to actually tilt some of the flowers in order to make it work and look right. Once you’re happy with your arrangement, get your hot glue on.

Step 6: Marvel at how easy and awesome this craft was to do!

Leave a comment

Filed under Uncategorized

Project Idea: Teacher Gifts

Last week was so emotional. My daughter moved up a class and changed teachers. I have such mixed feelings about this, as I did at this time last year, when I felt EXACTLY the same way. For a full year you put your trust in these teachers, you get to know them, and they are one of the few, aside from yourself, who knows all your child’s quirks. Their attitude. Their nuances. And even though we only moved classrooms, and these teachers are for the most part still there, it’s never quite the same is it? (Excuse me while I run to get a tissue) Some of these teachers left – as they’ve found new opportunities – there were tear-filled goodbyes.

I wanted to show them how much we appreciated them over the past year, even though a gift can never speak as loud as your thoughts. I know they get paid for their job, but for someone who watches my child 50 hours a week, I can never express enough gratitude. Last weekend, my Mom helped me sew together the zipper bags. They turned out so cute! I was so happy with the results.

I wrote an individual note to each teacher, sharing our appreciation (all from my daughter’s perspective of course). I designed a card and included the thank you pictures I took from the previous weekend. And to add a touch of “personalization” – I cut out a “bite mark” in the upper right corner of the cards – as she is well-known for her biting habits (not good, I know). But truth nonetheless.

I then printed out her most recent photo to include. Made some labels from a template I found via Pinterest. And voila! Handmade with love. Seriously.

Very easy. Very sincere. Very doable. Need I say more. I hope they were well received! It didn’t hurt that I may have also loaded them down with cookies.

Leave a comment

Filed under Uncategorized

DIY: Recycled Tire Rocker (aka Tire Teeter Totter)

I pinned this DIY a few weeks ago on my Pinterest board, thinking it was a cute idea, but really? would I ever have a chance to execute it? All signs pointed to “doubtful”. Then I got an invitation to a 1st birthday party for my friends’ little girl and on the bottom of the invite it read “Regifted, reused, or repurposed gifts only…” – and I thought BINGO! It was really a battle between two options. a. the tire and b. the pillowcase mat – I didn’t own any cute pillowcases and I couldn’t find any standalone for purchase at Target, so… tire rocker it was.

I wasn’t worried about where to get the tire, I knew my parents had plenty out at their place. They use them yearly to plant their zucchini/yellow squash harvest. The tire serves as the mound. Anyway, they said to come on out and take one off their hands – and they had plenty of scraps of wood due to a project they’ve been working on. So off we went on a Friday afternoon, hoping for the best, not quite certain how we were going to execute this – though my husband felt confident.  So, observe. The Tire Teeter Totter project. I would map out all the supplies for you, but I was on baby duty and dinner duty and supervision-of-project duty all at the same time and not quite certain I’d be able to remember everything, but you might be able to gather everything from the pics.

Step 1: Find yourself a tire and saw it in half. Be careful! Tires have steel threading in them (a new discovery for me – but if I would of thought about it, that makes sense!) Cip off any extra ‘wires’ with wire-cutters for safety reasons. We also pressure washed it to remove the grit/grime so our primer/spray paint would stay on!

Step 2: Spray paint your tire with a white primer. You can opt to save this step for after your screw in the 2×4’s.

Step 3:  Once your primer dries, cut 2 2×4’s the width of the tire and level, then screw in. 2 screws on each side.

Voila!

Step 4:  Cut a 1×8 plank (we used cedar – as it was the sraps we had available) to the length of the tire. We measured 1 inch over on both sides to have a little overhang.

Step 5:  Attach the plank to the 2×4’s already attached to the tire.

Step 6: Sand down the plank to create a smooth surface. And round out the edges (safety!)

Step 7: This is where you can save the tire priming for. Make sure to get good coverage on all pieces. We primed the inside of the tire too, but it’s your choice. I don’t think it’s entirely necessary. 

Step 8: Once your primer dries, use your color of choice to spray paint all items – don’t forget to spray the screw heads as they will show!

Step 9: Reassemble your pieces.

Step 10: If you want an added safety feature, add a rope for your kiddo to grab on to. We added it when we reattached the cedar plank to the 2×4’s. Pretty simple.

And to personalize, we added a “C”

I thought of another great idea for this if they “rocking” doesn’t pan out. You could easily add two bolts to the sides and hang it from the tree as a swing.

If you have any questions about this project, just leave them in the comments section! Enjoy!

4 Comments

Filed under Uncategorized

Do You Stress Bake? I do!

I’m stressed out. Lots of things on my plate right now. And instead of relaxing and vegging on the couch to watch a good chick flick like a normal human being, my neurotic tendencies seems to increase ten-fold. So what do I do? I bake. Not necessarily for myself or for my family. Nine times out of 10 I’ll send it to my husbands work the next day. But it’s what I do. Either that, or I clean. And that didn’t sound quite as attractive tonight.

Luckily, my stress-release coincides with my daughters last day of Infant III class. She’s moving classes and changing teachers. I have such mixed feelings about this, as I did at this time last year. For a full year you put your trust in these teachers, you get to know them, and they are one of the few, aside from yourself, who knows all your child’s quirks. Their attitude. Their nuances. And even though we are only moving classrooms, and these teachers will for the most part still be there, it’s never quite the same is it? (Excuse me while I run to get a tissue) Some of these teachers are leaving – as they’ve found new opportunities. So there are going to be some tear-filled goodbyes.

And on top of all this, I am dealing with the issues of finding a balance between work and life. Oh, that golden question, that never has the easiest of answers, now does it?

I was browsing Pinterest recently (find me: Colleen Koenig) , as I can be found most late evenings and early mornings, and came across several glorious baking recipes. I have always loved to bake. Not so much cook – those recipes never seem to work out right. But baking, has always panned out (good pun!). In fact, here I am at age 7 or 8 holding my blue ribbon from a local 4-H Baking Competition (please don’t hate the ’80’s style – it was SO in back then):

I made a Hummingbird Cake – I’ll never forget that thing. My mother picked out the recipe – I thought it sounded terrible. I only remember trying it maybe a handful of times. But I’ve been known to have a bit of a theatrical streak – and I did end up getting my BBA in Marketing – so I think my sales techniques must of really rubbed off on the judges. And when it was time to go to auction (yes, a baking auction!), kaboom! $100. for. a. cake. Have you heard of this nonsense? I love it! One day I’ll pay it forward to my local 4-H  – if they are even still doing this anymore. Do kids even appreciate $100 anymore? Or would they scoff? All these questions…

Anyway, back to my point (I tend to ramble, stop me if you can)….

Pinterest. Right.

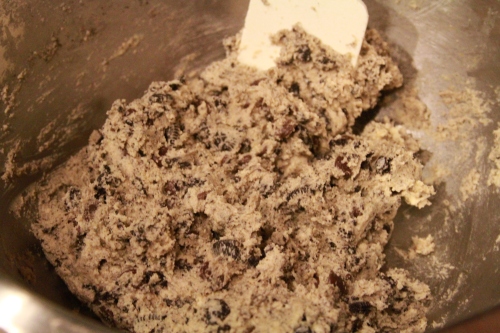
I came across a delightful recipe from the Lovin’ in the Oven blog – Chocolate Chip Oreo Cookies – and boy did I have to try these bad boys. I mean…hello?? A cookie, that uses another cookie as an ingredient in a recipe?!? That’s INSANITY. I had to. I just did. So I stopped at the store on the way home, got all the ingredients I lacked, and whipped up a batch when I got home. Observe.

STOP! This is where you get to vent your stress and beat the you-know-what out of some cookies! Choose your weapon:

and unleash the FURY!

And I think you know where to take it from here. I made enough to take to KT’s teachers and also to take some extra to work. Can’t wait to see what the review is on these guys!

As a side note: I need to work on my food photography. There are no plans to turn this into a foodie blog, but on occasion I’ll post something and I’d at least like to make the end result appear scrumptious!

2 Comments

Filed under Uncategorized

DIY: Picture Frame Bow Holder

Finally, a DIY that I did all myself! I don’t know how many DIY’s I’ve tagged on Pinterest over the past month with the intention of actually doing one, knowing that there is not enough time in the day to possibly get around to another project. But, KT is in desparate need of a bow holder, not that she has any intention of keeping them in her hair. While I find all the flower bow holders out there really cute, my style is slightly more modern, so I needed something that would be cutesy enough for a girl, but wouldn’t be too overboard for me.  Insert this DIY.

Supplies:

Cheap photo frame. If you’re into embellishments, the gaudier, the better. Me, not so much. I chose a simple frame that was on the sale rack for $4.99 (win!). 

Decorative ribbon. You can use all one color if you want, but I wanted something bright to offset the white I was planning on painting the frame with. I scored these for $1.00/each at Michael’s.

Sandpaper. You’ll need to prep your frame before you spray paint it. I tried my husbands electric sander, trust me, hand sanding works well enough. Particularly if you do have embellishments on your frame. The electric sander can be a little…over enthusiastic if you understand what I mean.

Semi-Gloss (or Gloss) Spray Paint. I chose a semi-gloss, but in retrospect think I should of gone with a glossier finish. White was my color of choice as my daughter’s room and bathroom have more than enough color. Make sure you research the correct way to spray paint. I was a bit too excited and started spraying in no particular fashion. After noticing several paint runs on my frame, I had to do some extra sanding and retouching. Avoid if at all possible.

Directions.

Step 1. Sand down your frame (does this frame look different then the above? That’s because we had a DIY failure on the first frame. Something involving staples. That’s all I’ll say :). Make sure to wipe down your frame with a dry rag afterward to remove any sanding residue.

Step 2. Place the frame on a drop cloth, newspaper or cardboard surface. Something you don’t mind getting paint on. Proceed to spray paint the frame using a rhytmic left to right swipe. I hope this makes sense. Sounds a little bizarre putting this down in writing. Make sure you cover all exposed pieces of the frame. I didn’t care about the backside, as it will be against the wall, but make sure to evenly spray the sides of the frame. Follow dry time instructions according to the spray can.

Step 3. Once your frame is dry, cut your ribbon to the length of the frame with about an extra 1-2 inches to spare. Evenly space the ribbons and tape to hold in place. Taping really came in handy. This allowed me to analyze the distances in between the ribbons and adjust before committing to the staple.

Step 4. Once you’ve decided that your ribbons are good – proceed to staple them in to the frame. A simple staple gun will do – my husband hooked me up with his fancy gun. It was fun to use. 🙂

Step 5.  Cut off excess ribbon.

Step 6.  Hang your frame and pin on some bows!

2 Comments

Filed under Uncategorized

Brushfire Fairytales

One of my closest girlfriends is having her second baby this July – another baby boy! She claims she’s the worst designer, but I don’t think she gives herself enough credit. I just think she second guesses her design choices! For instance, when I asked her what Baby 2’s (as yet, unnamed) room color would be, she said it was a toss up between blue/brown or green/brown. So, I tried to stick within those parameters. But, I found myself trying to guess the shades she’d use, or what if it didn’t go, and I tried to be too matchy-matchy. So I scrubbed that entire idea, and went with my gut.

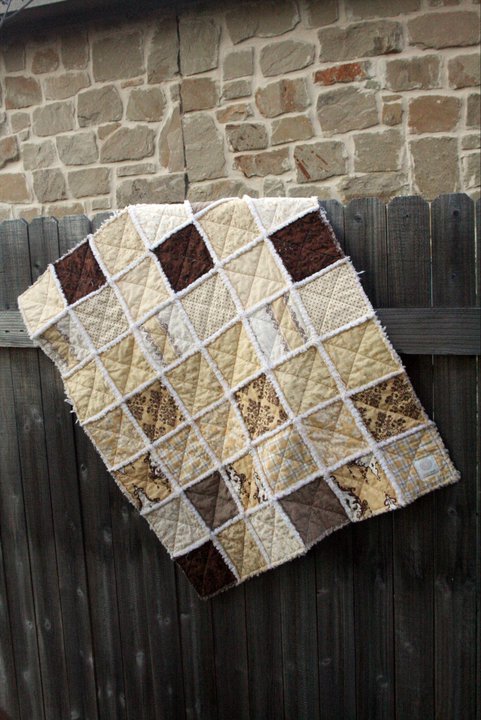
Said girlfriend used to live on the beach, and still has a fondness for anything beach-related. Her wedding colors were brown, turquoise and coral (beautiful combination, might I add). So, after perusing my fabric sites, I found THE set – and I must say, this is one of my favorite quilts thus far. Which surprises me, since I never thought I was one on ‘themes’ – and this quilt is close to one.

Maybe it’s because of the tranquil colors that exude relaxation and peace. I envision Jack Johnson strumming out one of his tunes (doesn’t hurt that he’s still one of my favorite singers). In fact, this vision brought about the name of this quilt, Brushfire Fairytales. I think it fits perfectly.

Definitely hoping to add this one to the shop!

Leave a comment

Filed under Uncategorized

May 2011: Current Listings

While I’ve been busy with custom orders, there are still plenty of Sweet Teal quilts available on the Etsy shop! Even a boy’s quilt! Gasp, I know. Here’s what’s currently in house:

Merry Meadow

Cinnamon Sweet

Bold Bohemian

Awash in Amethyst

Plum Sky

Keep checking the Sweet Teal Etsy shop for more great quilts. I’m working on a boys quilt that I hope to have listed by the end of the month!

Leave a comment

Filed under Uncategorized

Let’s Get Caught Up

Aaaaagh! I’ve been so good at my Twitter feed (well, MOSTLY good) and rocking my Facebook page, that I’ve let this poor blog drop to the wayside. I’m going to TRY my best to keep it regularly updated. I guess you’d like to know my definition of regularly though, huh?

Let’s get up to date, shall we?

Some very exciting news – Sweet Teal made it’s very first ETSY sale (and we’re talking, not a friend, not a family member, 100% legit sale) back in April! My “Modern Peach” quilt in fact (see previous blog entry). I absolutely loved that fabric and really hope that the Etsian who bought it loved it too!

An old friend kept me very busy through the month of February and April with 4 custom orders! I am so very thankful for these purchases and through all the word-of-mouth that my friends and family have done for me – so thank you Sweet Teal fans!

Leave a comment

Filed under Uncategorized

In the Works

I’m back from vacation! My husband and I took a much needed celebratory (birthdays + 5 yr wedding anniv) trip to Boston and NYC this past week! What a beautiful part of the country. I recommend it to everyone. But December may be a little to chilly for my fellow Texans. We just could not get used to the 20-degree temps! Freezing. Could of used an adult sized Sweet Teal blanket to keep me warm. *noted*

Just wanted to let y’all know I’m working on the next Sweet Teal rag quilt. Made with new fabrics that I received a few weeks ago – in love with these sherbert, lime and gray colors!

Should have it ready to go by the weekend. Perfect for your little one’s Christmas and/or any upcoming baby showers!


Leave a comment

Filed under Uncategorized